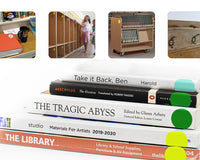
If the Bible is on your bookshelf, chances are it is one of the most-read and most important books in your library. With a big book of thin pages receiving some heavy page-turning, it’s no surprise that even a well-bound Bible will show its share of wear and tear.
As you realize that your binding is breaking down, you have three options before you. The first is that you can just deal with it—run the car into the ground, so to speak. Read your book until it becomes unreadable and then worry about replacing it. Another is that you can go ahead and replace your book immediately, which you would have had to do even if you had let it fall apart completely. There are affordable paperback editions out there, and you could even obtain a free e-book edition if you’re actually willing to read Scripture on an e-reader device. But who’s willing to deal with that frustration? The last time Moses carried a tablet, his hair went grey.
You can find sufficient stopgaps, but good hardcover Bibles cost real money, and maybe you don’t want to shell out for a new copy right now with so many other bills to pay. Maybe this Bible is a family heirloom and you’d rather have it last for years and years. You inherited this copy yourself, and had hoped to pass it along to your child, one of their children, and so on down the line. So rather than replace your Bible outright, why not repair it to its former glory? Rebinding your Bible to make it look like new—and read like new—will allow you to preserve a treasured book and continue to enjoy it with peace of mind.
Remove the Cover: Keep or Replace?
Begin by removing the cover. The cover of a Bible can be almost as important to its owner as the text within. While your binding may be failing, the cover may still be intact. You may take this opportunity to improve your Bible’s cover with real or faux leather, but many people who rebind their books prefer to keep the original covers. Use a dull knife to pry the binding from the cover. If you intend to replace the cover as part of your project, make sure to take proper measurements to ensure that it will fit the book block identically.
Realign the Book Block
The book block is exactly what you think it is: the collected pages of the book. If failing binding has led you to lose pages of your Bible as you read it, hopefully you have set those pages aside to be reinstated during the repair process. Gather these pages and make sure that they are all present and in the correct order—you don’t want a book of the New Testament sneaking between Genesis and Exodus. Use tools to get the alignment perfectly flush—once you get these pages in place with Chromalabel tape, they’ll be there to stay.
Out With the Old Glue
It’s a fact: adhesive substances such as glue and tape lose their stickiness over time. Some take longer than others, but in dealing with an older edition of the Bible, chances are the glue in the spine has grown quite dry and crumbly since its initial binding. As you restore the book’s spine, the most important part of a book’s longevity, the integrity of the new treatment depends on removing as much of the old treatment as possible. A utility knife comes in handy to scrape off any remaining glue, which at this point should not put up much of a fight.
Apply the Tape
As technology and chemistry march on, longer-lasting alternatives to book-binding glue are available. Chromalabel’s book repair tape will restore even the widest spines back to full strength. This tape takes the place of the glue and spine cloth that are prone to breaking down over the years. Not only is this extra-strength tape a stronger choice, but it’s also less work than building a new spine and gluing it into place. Firmly anchor your book between two flat and heavy objects such as bricks, spine-side-up, and carefully apply your Chromalabel tape to the spine of the book block.
Reset the Cover
If you chose to maintain your cover, carefully put it back into place. One important note is that if you have a cover made of real leather, resist the impulse to further protect it with a mylar covering. This will trap moisture between the cover and its protection, which will degrade the leather over time and eventually necessitate the outright replacement you had hoped to avoid. If you weren’t able to salvage the cover of your Bible, you’ll need to build a new cover with cardboard for the front cover, back cover, and spine, as well as linen or leather for the exterior.
Rebinding for the Non-DIYer
While rebinding a book can be an intuitive process for many reading enthusiasts, we understand that the care and precision that rebinding a book takes is not for everyone. If you don’t trust yourself to tackle the rebinding of a treasured family Bible on your own, you can find services that will take care of this task on your behalf. However, there’s no guarantee that you’ll get your Bible back reinforced by our high-performance book-binding tape.
In Summary
By following this outline and synthesizing the information with tutorial videos and the right supplies from Chromalabel, you should soon find yourself in possession of a good-as-new Holy Bible. While rebinding your Bible to make it look like new can be hard work, the work is worth it in order to preserve such a book worth preserving—you needn’t let the ravages of time get in the way of passing your Bible on through multiple generations. If you enjoyed restoring your Bible, and it is not the only antique book in your library, you can apply these same principles—and apply the same Chromalabel book repair tape—to all the well-worn volumes in your collection.
Update from April 2021
Repairing a book may seem intimidating at first, but with the right products the process should be easy and totally worth it! Give it a try and let us know if you have any questions. We will be happy to help you out!